

10 Essential Adhesive Tips for DIY Home Improvement Projects

Adhesives are often the unsung heroes of DIY home improvement projects. Whether you’re fixing a broken chair, installing new fixtures, or embarking on an ambitious home renovation, the right adhesive can make all the difference. At Stuk Solutions, we know that using the correct adhesive is crucial for the success of any DIY project. Let's dive into these ten essential adhesive tips to ensure your home improvement projects are a resounding success.
Stick to Success with the Right Adhesive
Welcome to Stuk Solutions! Today, we're diving into the crucial role of adhesives in DIY home improvement projects. Whether you're repairing a broken chair, installing new fixtures, or tackling an ambitious home renovation, the right adhesive can make all the difference. A well-chosen adhesive not only enhances the durability and aesthetics of your project but also ensures its overall success. Understanding the importance of adhesives is key for any DIY enthusiast aiming for professional-quality results.
Importance of Adhesives
Adhesives are not just supplementary tools; they are fundamental components of DIY craftsmanship. Using the correct adhesive is essential for the longevity and functionality of your projects. A strong bond ensures that your creations can withstand the test of time and daily use. From securing wood joints to bonding intricate plastic parts, the right adhesive makes your work reliable and sturdy. So, let’s explore the top ten adhesive tips to help you achieve outstanding results in your DIY home improvement endeavors.
Tip 1: Choosing the Right Adhesive for Your Material

Material Match
One of the most critical aspects of any DIY project is selecting the appropriate adhesive for the materials you're working with. Different materials require different adhesives to ensure a strong, lasting bond. Here’s a guide to help you match adhesives to specific materials:
- Wood: Wood glue is specifically formulated for timber and offers a bond that strengthens over time. It penetrates the wood fibers and creates a joint that can be stronger than the wood itself.
- Metal: Epoxy adhesives are ideal for metal and other rigid materials due to their strong bonding capabilities and resistance to heat and chemicals.
- Plastic: Cyanoacrylate, commonly known as super glue, is perfect for plastic and small, intricate parts. It provides a quick and strong bond, making it suitable for minor repairs and assembly.
- Glass: Silicone sealant is excellent for glass and waterproof applications. It remains flexible and resilient, ideal for sealing and bonding glass surfaces.
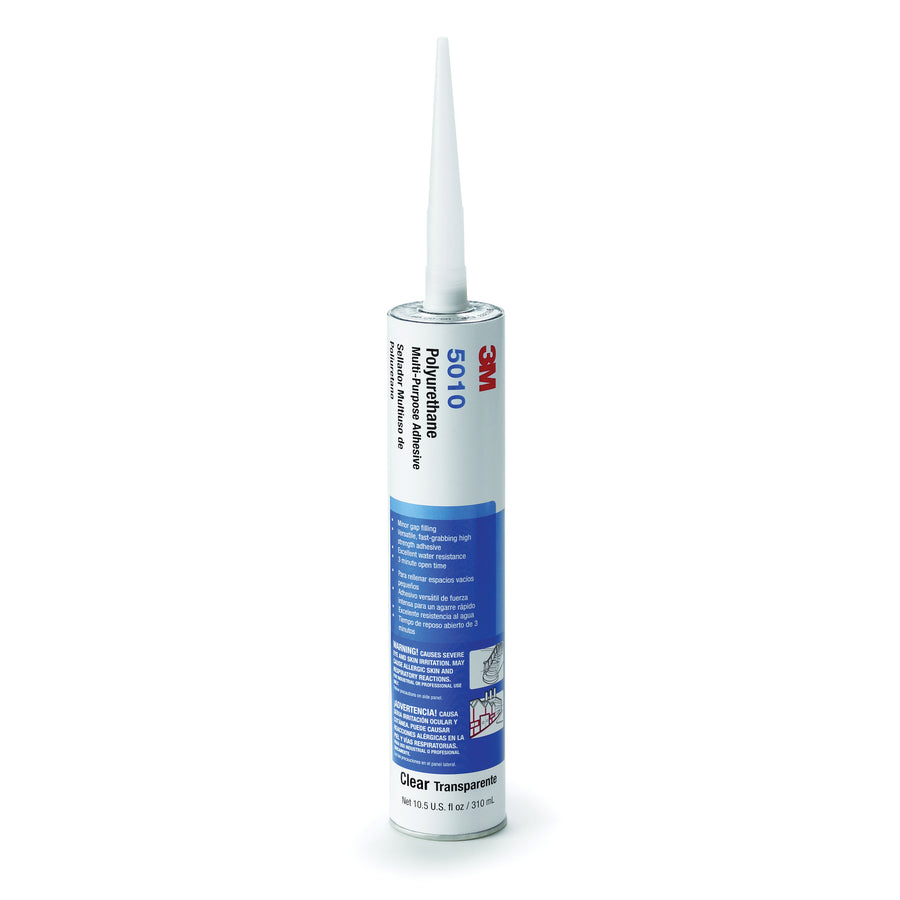
- Fabric: Polyurethane adhesive is versatile and can be used on a variety of surfaces, including fabric, wood, metal, and plastic.
Examples and Uses
Here are some common adhesives and their ideal uses:
- Epoxy: Use epoxy for metal repairs, bonding ceramics, and other rigid materials. It creates a very strong bond and can be used in structural applications.
- Wood Glue: Best for woodworking projects such as furniture repair, cabinet making, and crafting wooden items. It is essential for creating strong wood joints.
- Cyanoacrylate (Super Glue): Ideal for quick repairs on plastic, rubber, and small parts. It's perfect for projects that require precision and a fast-setting bond.
- Polyurethane Adhesive: Great for multi-surface bonding, especially where flexibility is needed. Use it for outdoor projects, upholstery, and repairs that involve mixed materials.
- Silicone Sealant: Perfect for sealing windows, aquariums, and any project that requires a waterproof seal. It’s also used in bathrooms and kitchens for sealing fixtures.
Brand Recommendations
At Stuk Solutions, we recommend high-quality adhesive brands that have proven their reliability and performance. Some of our top picks include:
- 3M: Known for its wide range of industrial-strength adhesives, 3M products are perfect for demanding DIY projects.
- LePage: A trusted brand for home repairs and crafting, offering a variety of adhesives suitable for different materials and applications.
Choosing the right adhesive from these reputable brands will ensure your projects are durable and professional-looking.

Tip 2: Surface Preparation
Cleaning and Prepping
Proper surface preparation is essential to ensure maximum adhesion. No matter how strong your adhesive is, it won't bond effectively if the surfaces aren't prepared correctly. Here’s how to prep different materials:
- Wood: Sand the surface to remove any rough spots or old finishes. After sanding, wipe the surface with a damp cloth to remove all dust and debris.
- Metal: Degrease the surface with alcohol or acetone to remove oils and contaminants. This step is crucial for a clean, oil-free surface that allows the adhesive to bond strongly.
- Plastic: Clean with a mild detergent and water. Rinse and dry the surface completely to ensure no soap residue is left, which could interfere with adhesion.
- Glass: Clean with a glass cleaner or a mixture of water and vinegar. Dry thoroughly to avoid streaks and ensure a clear, adhesive-ready surface.
Tools and Techniques
Having the right tools and knowing the correct techniques can make surface preparation much more effective. Here are some essentials:
- Sandpaper: Use various grits for different levels of sanding, from rough shaping to fine finishing.
- Alcohol Wipes: Ideal for quick cleaning and degreasing of metal surfaces.
- Cleaning Brushes: Useful for scrubbing off stubborn dirt and debris from surfaces.
- Microfiber Cloths: Perfect for dusting and wiping surfaces clean without leaving lint behind.
By thoroughly cleaning and prepping your surfaces, you ensure that the adhesive will form a strong, lasting bond, leading to a successful and durable project.
Tip 3: Understanding Drying Times
Quick vs. Slow-Drying Adhesives
Understanding the drying times of adhesives is crucial for planning and executing your DIY projects. Adhesives can broadly be categorized into quick-drying and slow-drying types, each with its best use cases:
- Quick-Drying Adhesives: These include super glue and hot glue. They set within seconds to minutes, making them ideal for projects that require immediate handling and quick fixes.
- Slow-Drying Adhesives: Epoxy and construction adhesives fall into this category. They take longer to dry, often several hours to a day, but they form stronger, more durable bonds suitable for heavy-duty applications.

Project Planning
Proper project planning around adhesive drying times can significantly improve your workflow and end results. Here are some tips:
- Staging Work: Organize your project steps to allow for adhesive curing without interruptions. This might involve working on other parts of the project while waiting for adhesive to dry.
- Drying Environment: Temperature and humidity can affect drying times. A warm, dry environment typically speeds up drying, while a cold, damp one slows it down. For optimal results, try to control these factors as much as possible. For example, curing epoxy in a well-ventilated, warm room will help it set faster and stronger.
By understanding and accommodating the drying times of various adhesives, you can ensure each component of your project is securely bonded and ready for the next step without unnecessary delays.
Tip 4: Application Techniques
Even Application
Achieving an even, consistent layer of adhesive is crucial for a strong bond and professional finish. Here are some best practices for applying adhesives:
- Spreading Tools: Use tools like brushes, rollers, or spreaders to distribute the adhesive uniformly across the surface. These tools help ensure a thin, even layer that maximizes bonding.
- Adhesive Quantity: Using the right amount of adhesive is key. Too much can weaken the bond by creating excess that seeps out, while too little can lead to gaps and weak spots. Follow the manufacturer's recommendations for the ideal amount.

Avoiding Bubbles
Air bubbles can compromise the strength of the adhesive bond. Here are some tips to avoid them:
- Application Speed: Apply the adhesive slowly and steadily. Rushing can trap air and create bubbles.
- Surface Contact: Press the surfaces together firmly and evenly to expel trapped air. Using a rolling pin or a similar tool can help ensure a smooth, bubble-free application.
By applying adhesives evenly and avoiding bubbles, you can achieve a strong, reliable bond that enhances the overall quality of your DIY projects.
Tip 5: Safety First
Safety Precautions
Handling adhesives requires certain safety measures to protect yourself and ensure a safe working environment. Here are some essential precautions:
- Ventilation: Always work in a well-ventilated area to avoid inhaling fumes, which can be harmful.
- Protective Gear: Wear gloves to protect your skin, masks to avoid inhaling fumes, and eye protection to prevent adhesive splashes from getting into your eyes.
- Instructions Compliance: Follow the manufacturer’s safety instructions meticulously. These guidelines are designed to ensure safe and effective use.
Emergency Measures
Accidents can happen, so it’s important to know what to do if you’re exposed to adhesives:
- Skin Contact: If adhesive gets on your skin, wash it off immediately with soap and water. Avoid using harsh chemicals to remove it, as they can cause further irritation.
- Eye Contact: In case of eye contact, rinse thoroughly with water for at least 15 minutes and seek medical attention if irritation persists.
- Inhalation: If you experience respiratory issues after inhaling adhesive fumes, move to fresh air immediately and seek medical help if symptoms continue.
Prioritizing safety when handling adhesives ensures that your DIY projects are not only successful but also safe for you and those around you.

Tip 6: Adhesive Removal
Safe Removal
Removing adhesives without damaging the surfaces can be tricky. Here are detailed steps to safely remove adhesives from various surfaces:
- Heat Application: Using a heat gun or a hairdryer can soften adhesives, making them easier to scrape off. Apply heat evenly and gently peel away the adhesive.
- Solvents: Specific solvents can dissolve adhesives. For example, acetone works well for super glue, while mineral spirits can be used for construction adhesives. Apply the solvent with a cloth and allow it to sit for a few minutes before wiping or scraping the adhesive away.
- Mechanical Methods: Sometimes, physical removal is necessary. Use plastic scrapers or specialized adhesive removal tools to gently lift the adhesive from the surface without causing damage.
Removal Products
At Stuk Solutions, we offer specialized adhesive removal products designed to make the process easier and more effective. These products are formulated to break down adhesives without harming the underlying materials. Using these can save time and effort, ensuring a clean finish.
Proper adhesive removal techniques are essential for maintaining the integrity of your surfaces and preparing them for new applications.
Tip 7: Storage of Adhesives
Proper Storage
Storing adhesives correctly is crucial to maintaining their effectiveness over time. Here’s how to ensure your adhesives remain in top condition:
- Temperature Control: Store adhesives in a cool, dry place. Extreme temperatures can degrade the adhesive properties, making them less effective when you need them.
- Sealing Containers: Always ensure containers are tightly sealed to avoid exposure to air and moisture, which can cause adhesives to dry out or become contaminated.
- Storage Duration: Adhere to the shelf-life recommendations provided by the manufacturer. Using adhesives past their expiration date can result in weak bonds and project failures.
- Labeling: Label storage containers with the purchase date to keep track of their age and ensure you use them within the optimal timeframe.
Proper storage practices help maintain the quality and performance of your adhesives, ensuring they are ready for use when needed.
Common Mistakes

Even experienced DIY enthusiasts can make mistakes when using adhesives. Here are some frequent errors and their consequences:
- Incorrect Adhesive Choice: Using the wrong adhesive for a material can result in weak bonds and project failure. For instance, using wood glue on plastic won’t provide a strong bond.
- Inadequate Surface Preparation: Failing to clean and prep surfaces properly can lead to adhesion failure. Dirt, dust, and oils can prevent adhesives from bonding effectively.
- Over-Application: Applying too much adhesive can cause seepage and weakening of the bond. Excess adhesive can also lead to a messy finish.
Prevention Tips
Avoiding these mistakes can significantly improve the outcome of your DIY projects:
- Reading Labels: Always read adhesive labels and instructions to understand their specific applications and limitations.
- Manufacturer Instructions: Follow the manufacturer's guidelines closely for the best results. These instructions are designed to help you achieve the strongest bond.
- Small Area Testing: Before full application, test adhesives on a small, inconspicuous area to ensure compatibility and effectiveness.
By being mindful of these common mistakes and taking steps to avoid them, you can enhance the quality and durability of your DIY projects.
Tip 9: Specialty Adhesives
Specialty Uses
Certain projects require adhesives with unique properties. Here are some specialty adhesives and their benefits:
- Waterproof Adhesives: Ideal for outdoor projects or areas exposed to moisture, such as bathrooms and kitchens. These adhesives are designed to withstand water and maintain a strong bond even in wet conditions.
- High-Heat Adhesives: Suitable for applications involving high temperatures, like automotive repairs or industrial settings. They are formulated to resist heat without losing their bonding strength.
- Flexible Adhesives: Perfect for materials that expand and contract, such as rubber or fabric. These adhesives remain flexible after curing, accommodating the movement of the materials they bond.
Usage Scenarios
Here are some examples of projects that benefit from specialty adhesives:
- Waterproofing: Use waterproof adhesives to seal bathroom fixtures, repair outdoor furniture, or create watertight bonds in kitchens.
- High Heat: High-heat adhesives are excellent for repairing engine parts, sealing heating elements, or any project involving exposure to high temperatures.
- Flexibility: Flexible adhesives are ideal for crafting projects with fabrics, bonding rubber components, or any application where materials need to move or flex without breaking the bond.

Product Recommendations
At Stuk Solutions, we offer a range of specialty adhesives tailored for these specific needs. Some recommended products include:
- Waterproof Adhesives: Our waterproof adhesive products are perfect for both indoor and outdoor applications, ensuring long-lasting durability in moist environments.
- High-Heat Adhesives: We stock high-heat adhesives designed to maintain their strength under extreme temperatures, ideal for automotive and industrial use.
- Flexible Adhesives: Our flexible adhesives provide strong bonds while allowing for material movement, perfect for crafts and repairs involving elastic materials.
By choosing the right specialty adhesive for your project, you can achieve results that are not only strong but also suited to the specific demands of the application.
Tip 10: Environmental Considerations
Eco-Friendly Adhesives
The growing emphasis on sustainability has led to the development of environmentally friendly adhesives. These adhesives offer several benefits:
- Health Benefits: Eco-friendly adhesives reduce exposure to harmful chemicals, improving indoor air quality and creating a safer environment for you and your family.
- Environmental Impact: These adhesives have a lower environmental footprint, helping you comply with green building standards and contribute to environmental conservation.

Certifications and Standards
When selecting eco-friendly adhesives, look for the following certifications and standards:
- VOC Ratings: Low-VOC (Volatile Organic Compounds) adhesives emit fewer harmful chemicals, making them safer for indoor use and better for the environment.
- Green Certifications: Certifications like LEED (Leadership in Energy and Environmental Design) indicate that the adhesive meets high environmental and health standards.
Eco-Friendly Products
Stuk Solutions offers a range of eco-friendly adhesive products that provide excellent performance while being kind to the environment. Our eco-friendly adhesives are designed to meet rigorous environmental standards without compromising on bonding strength and durability.
By opting for eco-friendly adhesives, you not only improve the health and safety of your home but also contribute to a more sustainable future.
Conclusion
Recap Key Points
To summarize, here are the key takeaways from our ten essential adhesive tips for DIY home improvement projects:
- Choosing the Right Adhesive: Match adhesives to specific materials for optimal bonding.
- Surface Preparation: Clean and prep surfaces thoroughly to ensure maximum adhesion.
- Understanding Drying Times: Plan your projects around adhesive drying times for efficient workflow.
- Application Techniques: Apply adhesives evenly and avoid bubbles for a strong bond.
- Safety First: Follow safety precautions to protect yourself while handling adhesives.
- Adhesive Removal: Remove adhesives safely without damaging surfaces.
- Storage of Adhesives: Store adhesives properly to maintain their effectiveness.
- Avoiding Common Mistakes: Be mindful of common adhesive application errors and take steps to prevent them.
- Specialty Adhesives: Use specialty adhesives for specific applications to achieve the best results.
- Environmental Considerations: Opt for eco-friendly adhesives to improve health and reduce environmental impact.
Ready, Set, DIY!
Embarking on DIY projects can be both rewarding and challenging. By following these adhesive tips, you can approach your projects with confidence, knowing that you're equipped with the knowledge to achieve professional results. Proper adhesive use is crucial for the durability and aesthetics of your creations, and with Stuk Solutions' range of high-quality products, you're well on your way to success.
Stick with Stuk Solutions!
We invite you to explore Stuk Solutions' comprehensive adhesive product line, tailored for various home improvement needs. Take advantage of our special offers and discounts for new customers to get started on your next project.
Don't forget to subscribe to our blog for more tips, updates, and exclusive content. Share your own adhesive tips and project experiences in the comments section, and consider using the discount code DIY2024 for a special promotional offer for first-time subscribers.
Thank you for choosing Stuk Solutions as your trusted partner in all things adhesive. Happy DIYing!
Share this
Popular posts
STUK Solutions News
View all

Leave a comment